Intro: In this post, I’m exploring various techniques we can use in order to have a custom Window in a WPF project.
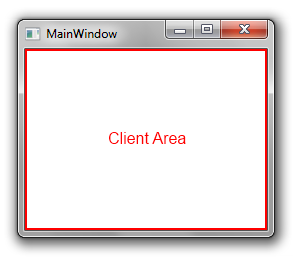
Today you start a new application. You open Visual Studio, “File”, “New”, “Project”, “WPF Application” and you start typing code… At some point, you might want to tune the main window of your application in order to have a custom header. The most common reason to do so is when you want to render some UI elements outside the standard client area of a window:
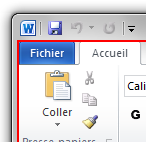
For example in order to have something similar to Office 2010 (with icons inside the Window’s header):
Also, you want to make sure you application works also great on Windows XP. This is probably not your personal choice but some guy from the marketing told you: it MUST runs on XP 🙂
Let see what are the various options you can choose
Option1: use the WindowStyle = None option on the “standard” WPF Window
- How to do?
In the XAML (or in the C# code), simply set the value of the WindowStyle property of your Window to None:
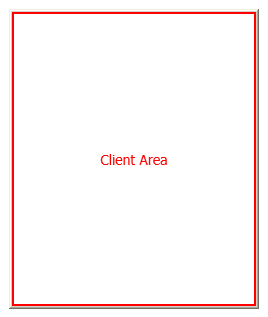
- How does it look on Window XP ?
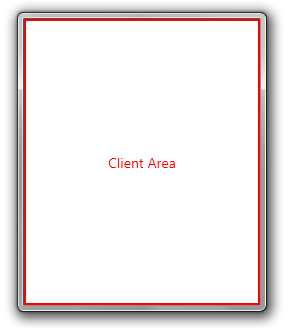
- How does it look on Windows 7 ?
- Advantages
– Same solution for Windows XP and Windows 7.
– The client area now occupies the whole Window. We are then able to render elements at the top of the Window in order to re-create the standard window header.
– Very simple to use (minimal changes in your code).
- Drawbacks
– A lot of work is needed to create the actual header: show the title of the Window, its context menu and the standard window buttons (Minimize, Restore, Close)
– Several problems appears when the Window gets maximized:
The Window occupies the whole screen and hide Windows’s taskbar. You need some interop code to change the MaxHeight/MaxWidth of the Window. You can see this post for more details: Maximizing window (with WindowStyle=None) considering Taskbar
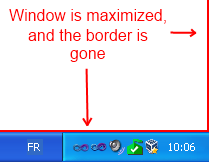
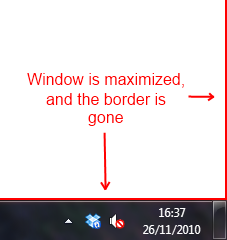
Even though you fix the previous problem, the border of the window is still visible when it gets maximized:
Option2: use Option1 + ResizeMode =NoResize in order to remove the remaining border
You can easily fix the previous problem by registering an event handler on the StateChanged event of the Window. In the event handler, you can set ResizeMode to NoResize (when the Window is maximized) so that the remaining border disappear.
- How to do?
In the constructor of the Window, you can add the following code:
this.StateChanged += (s, e) =>
{
    if (this.WindowState == WindowState.Maximized)
        this.ResizeMode = ResizeMode.NoResize;
    else
        this.ResizeMode = ResizeMode.CanResize;
};
- How does it look on Window XP ?
- How does it look on Windows 7 ?
- Advantages
– Same solution for Windows XP and Windows 7.
– You fixed the previous issue easily.
- Drawbacks
– No special drawbacks.
Option3: use Option2 + AllowTransparency = True
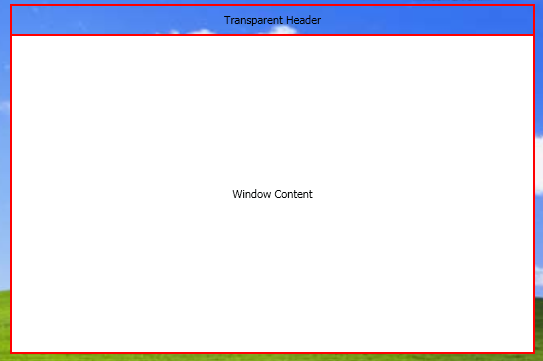
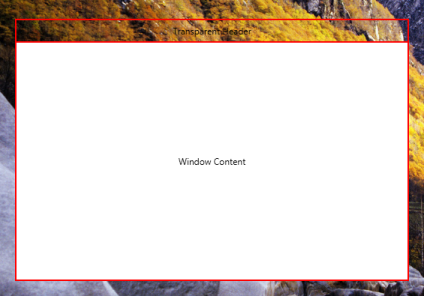
By using Option1 or Option2, you can have a much bigger client area than with a traditional Window. However, you still miss the glass effect or Aero. You might try to get this effect by adding transparency to your Window. The way to do so in WPF, is simply to set the value of the AllowTransparency property to true. Note that enabling transparency on the Window imply setting WindowStyle to None.
- How to do?
You can use the following XAML code:
- How does it look on Window XP ?
- How does it look on Windows 7 ?
- Advantages
– Minimal changes in your existing code
- Drawbacks
– On Windows 7, you’ll have to do some serious work in order to have the DWM Blur effect (you might need to combine some shaders effects…)
– On Windows 7, you lost the drop shadow of your Window
– You might get into performance issues by turning on this option.
For more details, you can check out this MSDN blog post “Transparent Windows in WPF“:
“The performance of WPF’s transparent windows is a topic of much concern. WPF is designed to render via DirectX. We do offer a software rendering fallback, but that is intended to provide a full-featured fallback, not for high performance. The layered window APIs, on the other hand, take a GDI HDC parameter. This causes different issues for XP and Vista.
Experience suggests that a full-screen constantly updating layered window on good XP machine can consume as little as 3% CPU in overhead.
Experience suggests that a full-screen constantly updating layered window on good Vista machine can consume as much as 30% CPU in overhead.”
Option4: use interop achieve the same effect as Option2 but without having to set AllowTransparency to true
As we just saw, using adding transparency to a WPF window by using the AllowTransparency property does not look the good way to go. In this last section, we’re going to see another way using Windows native APIs.
The APIs we’re interested in are in the DwmApi.dll library. Here is the associated MSDN documentation:
DwmExtendFrameIntoClientArea s the DWM function that extends the frame into the client area. It takes two parameters; a window handle and a MARGINS structure. MARGINS is used to tell the DWM how much extra the frame should be extended into the client area.
To use the DwmExtendFrameIntoClientArea function, a window handle must be obtained. In WPF, the window handle can be obtained from the Handle property of an HwndSource. In the following example, the frame is extended into the client area on the Loaded event of the window.
Using this API, you can achieve this kind of effect without having to use the AllowTransparency (on Vista or 7 only of course):
On Windows XP, you don’t have DWM and then you’ll not be able to have the glass effect. However, you can still extend the client area of your Window using some other Windows native API.
The easiest way to do all this work is to use the WPF Shell Integration Library, available on CodePlex:
The custom chrome feature allows applications control over the outer frame of the window so that WPF content can be drawn over the title bar. This allows applications to integrate with Aero glass to emulate the Office 2007/2010 look and feel, or to completely replace the frame with its own content without having to manage all the system behaviors that get lost when using WindowStyle.None.
This project also contains Windows 7 taskbar features (those features are now directly integrated in the .Net framework 4.0).
- How to do ?
You have to setup 2 distinct styles for Windows 7 and Windows XP. You can tweak them but here is the general organization of those styles:
On Windows XP:
As you can see, on Windows XP, you have to create the minimize/restore/close buttons yourself.
On Windows 7:
- How does it look on Window XP ?
- How does it look on Windows 7 ?
- Advantages
– No performance issue since AllowTransparency is not used
– On Windows 7 the header looks like standard OS windows
- Drawbacks
– You have 2 distinct solutions for Windows XP and Windows 7. On Windows XP, you have to add the Window’s buttons manually (reduce, maximize, close)
– You must rely on a new assembly Microsoft.Windows.Shell. However, if you don’t want to, you can import the source code in your project: the features are dispatched in two .cs files and released by Microsoft under the MS-PL License.
Conclusion
In any WPF application, the Windows frame itself matters. If you want to render graphical elements outside the client area, you must be careful. You basically have 2 options:
– stick to managed code only and use the AllowTransparency property. However, you must be aware of potential performance issues. Also, you’ll need to do a lot of work on your own.
– use Window native APIs. You’ll have to distinguish Windows OS which have DWM (Vista and 7) and XP. You’ll have optimal performance. The easiest way to do is to use the Shell Integration library project.
Interesting Links
- Extend glass frame into a WPF application (MSDN)
- Custom Window chrome in WPF (MSDN Blog)
- WPF in Visual Studio 2010: Window Management (Visual Studio 2010 Team Blog)
- WPF AllowTransparency problem, good on XP, bad on Vista (MSDN Forums)
- Transparent Window in WPF (MSDN Blog)
- Aero glass inside a WPF Window (MSDN Blog)
- A glass effect using a WPF Behavior (from Jeremiah Morrill)



On all your solutions, which ones enable the seven feature that dragging your window on top of one of your screen maximize it inside the screen (so usefull in dual display)
and so the fact taht a maximise window you drag it, making it becoming normal size and so enable it to stick on the top of the other screen (yes my explanations suxx)