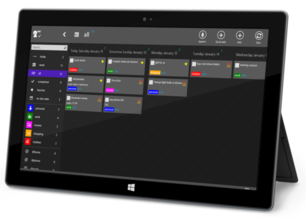
In this (long) post, I share some of the techniques I used to build 2Day for Windows 8 using C# and XAML.
2Day is a powerful todo-list app with synchronization capabilities. If you haven’t given it a try yet, grab it here for Windows 8 and here for Windows Phone.
Data access layer: SQLite (but not only)
No surprise here I’m using SQLite. Because I’m not big fan of SQL queries embedded deep in the C# code, I’m using sqlite-net (GitHub repo here) as the data access layer over SQLite. It’s very lightweight and provides a thin layer of abstraction. My business objects are decorated with attributes such as [PrimaryKey], [AutoIncrement], etc.
From the GitHub repository:
sqlite-net is an open source, minimal library to allow .NET and Mono applications to store data in SQLite 3 databases. It is written in C# and is meant to be simply compiled in with your projects. It was first designed to work with MonoTouch on the iPhone, but has grown up to work on all the platforms (Mono for Android, .NET, Silverlight, WP7, WinRT, Azure, etc.).
sqlite-net was designed as a quick and convenient database layer. Its design follows from these goals:
- Very easy to integrate with existing projects and with MonoTouch projects.
- Thin wrapper over SQLite and should be fast and efficient. (The library should not be the performance bottleneck of your queries.)
- Very simple methods for executing CRUD operations and queries safely (using parameters) and for retrieving the results of those query in a strongly typed fashion.
- Works with your data model without forcing you to change your classes. (Contains a small reflection-driven ORM layer.)
- 0 dependencies aside from a compiled form of the sqlite2 library.
What I like: easy to setup, easy to use, no additional dependencies
SQLCompact (Windows Phone) vs SQLite (Windows 8)
The challenge I had here is that the Windows Phone version of 2Day relies on SQLCompact: back in the Windows Phone 7 days, this was the only option and I hadn’t the chance to upgrade so far to SQLite…
SQLCompact has a nice “automatic change tracking” feature: when you turn this on, your objects are tracked automatically by the data access layer (using the INotifyPropertyChanging interface). When you call Save() on the database, it knows exactly what objects must be updated. Pretty handy isn’t it ?
In the SQLite world, I created a small piece of code to mimicthis feature. The implementation is straightforward: I register change notification callsbacks (from INotifyPropertyChanged interface) and push updated objects in a list. When I want to save the changes, I just go over this list and send each update in the database.
Crash handler (and the invisible stack trace)
When 2Day has an unhanded exception, I try to achieve 3 goals:
- mitigate the effect of the exception (decide whether the execution can continue or not)
- inform the user “something” went wrong
- log the maximum amount of information so that I can then fix the crash later on
The 8.1 update of WinRT introduced the ability to setup crash handler in a WinRT XAML app:
Application.Current.UnhandledException += this.OnUnhandledException;

private void OnUnhandledException(object sender, UnhandledExceptionEventArgs e)
{
}
However, this technique has an important limitation: most of the time the stack trace will be null or empty (apparently due to the interop between the native and managed world). That’s a big deal because when the exception will be logged it will not have the stack trace. Good luck with that to debug a NullReferenceException occurring somewhere in your app…
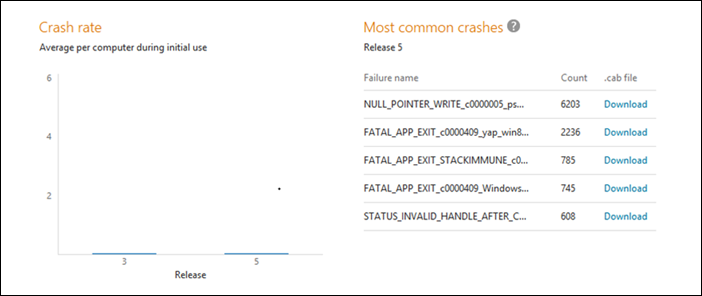
The Windows Store Dev Center also some quality diagnostic tool. Basically, crashes of your app are sent automatically to Microsoft. You can read more about this here (picture from the blog post):
GridView and drag/drop support
The main page in 2Day make heavy use of the GridView control. Here are some highlights about its usage:
- Basic options
- IsItemClickEnabled = true
- SelectionMode = multiple
- CanDragItems = true
- Items panel
- ItemsWrapGrid to have pixel-based UI virtualization
I wrote a “DragDropManager” tool that listens to drag events on the GridView and provide this nice drag/drop experience to organize your tasks:
http://youtu.be/oG-tETOE0WI
The collection databound to the GridView is a custom collection I was already using on the Windows Phone version. It manages groups and tasks with user defined sort options.
Message box and the “Access Denied” exception
The first versions of 2Day for Windows 8 had a bug that took me a while to fix. The exception message was “Access is denied”. I first thought it was related to I/O operation but it turns out it was related to the use of the message box !
Basically, you will get an “Access is denied” exception if you try to open a message box while one is already open. That sound silly to do that but I can assure you this kind happens once the app get bigger… and display message box in case of unhandled exception (as it was my case).
A nice blog post by fellow French Microsoft evangelist Eric Vernie provides a workaround here (in French). The idea is to use a SemaphoreSlim structure that we await when we try to display a message box. If 2 (or more) message boxes are shown, they will be shown one after the other.
Live tiles (and how to make it simple)
I’m using the great Live Tile library that is available in the Windows 8 App tiles and badge sample. It makes very easy to consume a specific tile template in a type safe manner (instead of building a raw XML string).
For example in order to have this live tile:

Which require this XML:
      Text Field 1 (larger text)
      Text Field 2
      Text Field 3
      Text Field 4
You can just write in C#:
var mediumTile = TileContentFactory.CreateTileSquare150x150Text01();
mediumTile.TextHeading.Text = "heading"
mediumTile.TextBody1.Text = "title1";
mediumTile.TextBody2.Text = "title2";
mediumTile.TextBody3.Text = "title3";
Cool, isn’t it ?
Code sharing with Windows Phone
No surprise here, code sharing with the Windows Phone version is achieved through Portable Class Libraries and Linked Files. However, because of the historical choice of SQLCompact in the Windows Phone version, the data model is not shared (but implemented twice).
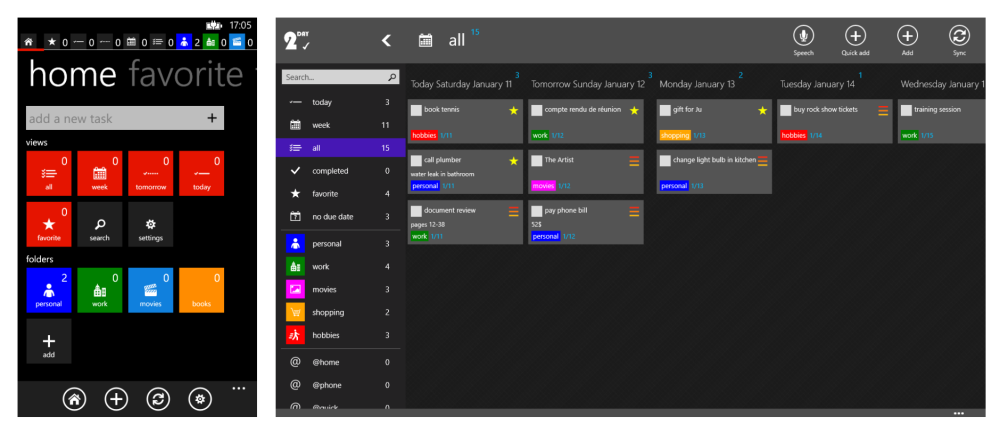
Of course the whole XAML UI is implemented twice. In a certain way, that does make sense when we see how different the UI are on both platforms:
Synchronization (using a Node.js powered backend running on Azure!)
2Day for Windows 8 introduced a new synchronization option for the users of the app: 2Day Cloud. The backend powering this new sync system is Azure Mobile Services (AMS).
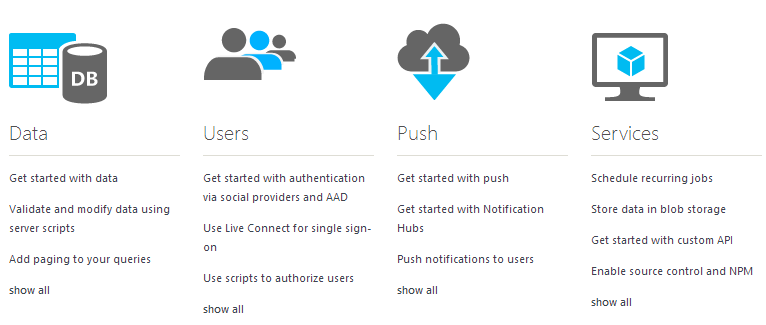
I’m using the following services of AMS:
- Authentication with Microsoft Account
- Single sign on, for Windows 8 device. You don’t have to even type your email or password
- Data, to store tasks, folders and other useful information
- Scripts, using a JavaScript (NodeJS) backend. I’m using this to filter each read query on the database to fetch only the items owned by specific users, storing update dates, etc.
- Scheduler, to remove old items from the database in order to optimize its size
Both the Windows 8 and the Windows Phone version uses the C# Azure Mobile Services SDK, with 100% code sharing between the two (using linked files).
Miscellaneous control
Other controls or libraries used in 2Day for Windows 8:
- My simple AppBarHint control (GitHub repo)
- Callisto, a library built by Microsoft XAML team member Tim Heuer, used in 2Day to have flying popups (GitHub repo)
- MarkedUp as the analytics engine in the Windows 8 version. The tool is free for up to 10, 000 unique users (see pricing details here) and extremely simple to add in the app:
MarkedUp.AnalyticClient.Initialize(WinConstants.MarkedUpId);
The Windows Phone version of 2Day uses Flurry but it will be soon updated to MarkedUp as well for coherence reason.
I hope you enjoyed this technical overview of 2Day for Windows 8. Please feel free to write a comment to share your thoughts or are questions about specific technical implementation details 🙂


